Save to Pinterest
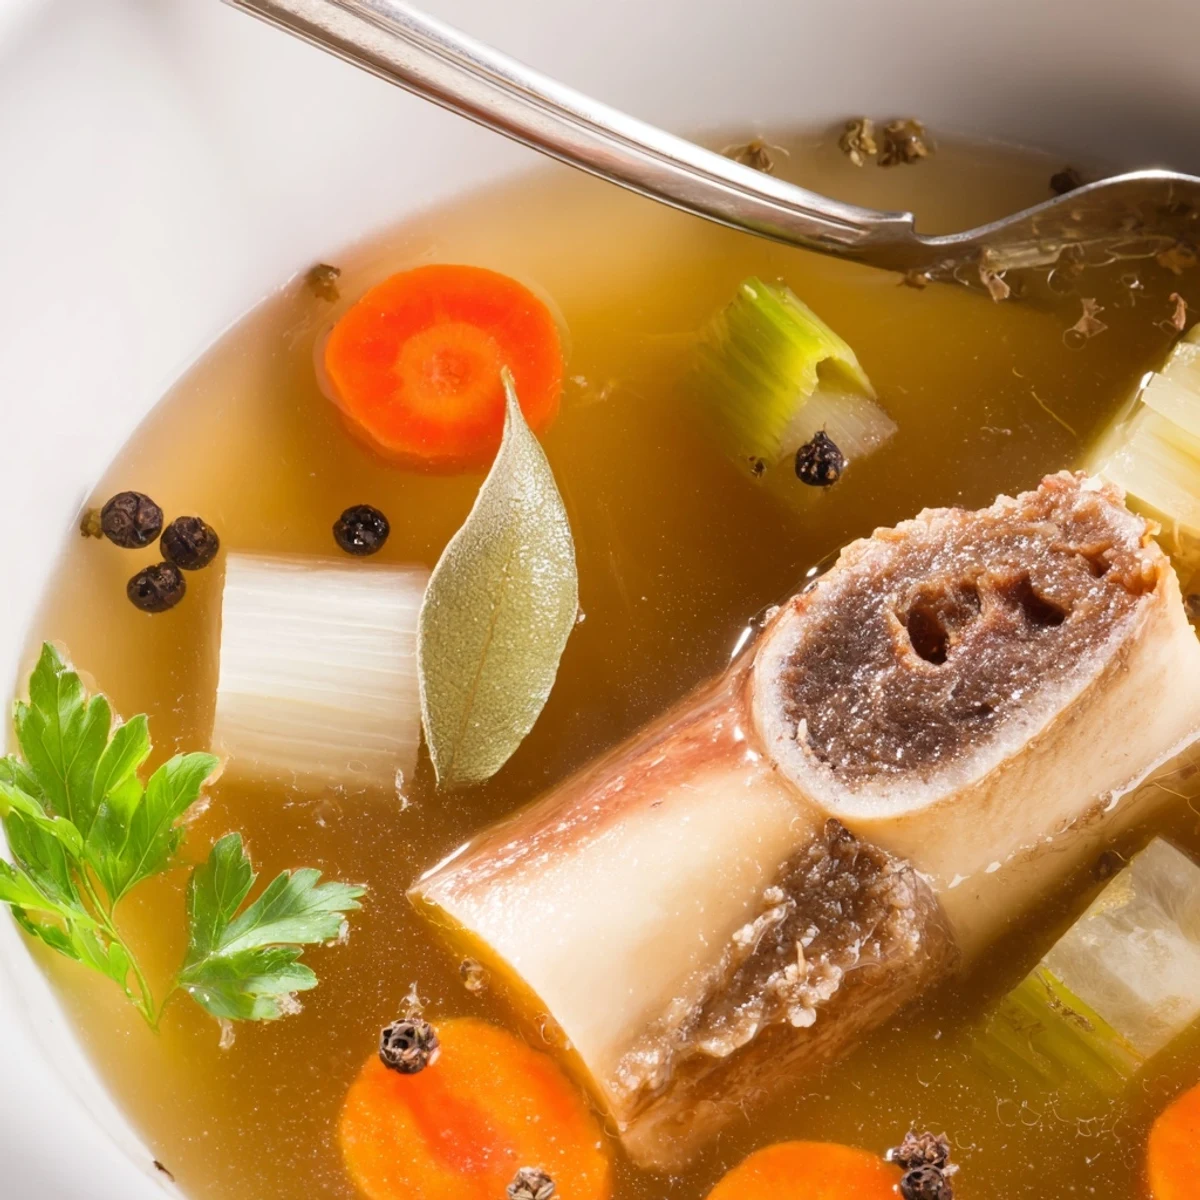
 Simmer beef bones with carrots, celery, onion, garlic, parsley, bay leaves and peppercorns, adding a splash of apple cider vinegar to help extract minerals. A low, gentle simmer for 12+ hours yields a deep, gelatinous liquid with concentrated flavor and body. Roast bones first for a darker, more savory result.
Strain through a fine sieve, season to taste, cool and refrigerate; skim off solidified fat before using as a sipping broth or as a base for soups, stews, risottos and sauces.
The smell of beef bones roasting in the oven on a cold Saturday morning is something everyone should experience at least once. It is deeply primal, the way the marrow sizzles and the house fills with this savory warmth that makes you feel like you are doing something important, even if you are just standing around in slippers waiting. My neighbor once knocked on my door asking what I was cooking because the aroma had drifted through the shared wall of our duplex. That was the day I realized bone broth is not really cooking, it is a slow act of patience that pays you back in gold.
I started making this broth years ago when a friend swore it cured her winter colds and honestly I was skeptical but also desperate enough to try anything. Now it is just something I do when the weather turns, a ritual that fills the kitchen with noise and steam and makes the whole apartment feel alive.
Ingredients
- Beef bones (2.5 lbs or 1.1 kg): A mix of marrow, knuckle, and oxtail gives the best balance of gelatin and flavor. Roasting them first is optional but you absolutely should because it changes everything.
- Carrots (2, roughly chopped): They add a subtle sweetness that rounds out the deep meaty flavor. No need to peel them, just give them a good scrub.
- Celery stalks (2, roughly chopped): Celery works quietly in the background here, lending an earthy base note that you would miss if it were gone.
- Large onion (1, quartered): Leave the skin on for a deeper color in the finished broth. It is one of those small choices that makes a visible difference.
- Garlic cloves (4, smashed): Smashing rather than mincing lets the garlic release its flavor slowly over the long simmer without turning bitter.
- Bay leaves (2): These are nonnegotiable for any serious broth. They bring a faint herbal depth that ties all the other flavors together.
- Fresh parsley (1 small bunch): Toss it in whole, stems and all. The stems hold more flavor than most people realize.
- Whole black peppercorns (1 tsp): Use whole, not cracked or ground, so the heat builds gently instead of overpowering the pot.
- Apple cider vinegar (2 tbsp): This is the secret weapon. The acid helps draw minerals out of the bones and into the broth, which is the whole point of this endeavor.
- Cold water (12 cups or 3 liters): Always start with cold water. It pulls more flavor from the bones as it slowly heats up.
- Salt (to taste, added after cooking): Salting at the end gives you full control over the final flavor. Broth reduces during simmering, so early salting can easily go too far.
Instructions
- Roast the bones:
- Spread the bones on a baking sheet and roast at 400 degrees F (200 degrees C) for 30 minutes until deeply browned. You will hear them crackle and pop, and that sound means flavor is building in ways raw bones can never achieve.
- Build the pot:
- Transfer the roasted bones to a large stockpot or slow cooker and add the carrots, celery, onion, garlic, bay leaves, parsley, and peppercorns. Pour in the apple cider vinegar and cold water, making sure everything is submerged.
- Bring to a simmer and skim:
- Set the pot over medium heat and bring it to a gentle simmer, not a rolling boil. During the first hour, skim off any gray foam or impurities that rise to the surface with a ladle or skimmer.
- Let time do the work:
- Lower the heat and let the broth simmer uncovered or partially covered for at least 12 hours. Check occasionally and add more water if the bones start poking above the surface.
- Strain and season:
- Pour the broth through a fine mesh sieve or cheesecloth into a large bowl or container, discarding all the solids. Season with salt to taste once it has cooled slightly.
- Cool and store:
- Let the broth cool completely, then refrigerate it so the fat solidifies into a solid layer on top that you can easily lift off. Store in the fridge for up to five days or freeze for up to three months.
 Save to Pinterest
 There is something grounding about ladling hot broth into a mug on a quiet Sunday evening, knowing it took almost no active effort but an entire day of gentle attention. It became my small act of self care before that phrase felt overused.
Choosing the Right Bones
Your butcher is the best resource here, and most are happy to save bones for you if you ask ahead. A combination of marrow bones for richness, knuckle bones for gelatin, and oxtail for body will give you the most complex and satisfying result. Do not be afraid of bones with a little meat still clinging to them, because that meat contributes flavor and the stray bits are a cooks reward when you strain the pot.
Slow Cooker vs Stovetop
Both methods work beautifully, but they behave differently over a long cook. The stovetop gives you more control over the simmer level and lets you reduce the broth slightly for a more concentrated flavor. A slow cooker is more hands off and safer if you plan to sleep while it runs, which realistically is what most people end up doing during a twelve hour cook.
How to Use Your Broth
Once you have a stash of this broth in your freezer, you will find yourself reaching for it constantly. It elevates everything it touches, from simple weeknight soups to risottos that suddenly taste like they came from a restaurant.
- Sip it plain from a mug with a squeeze of lemon on mornings when you need something warm but not heavy.
- Use it as the cooking liquid for grains like quinoa or rice to add depth where there would normally be none.
- Freeze it in ice cube trays so you always have small portions ready to deglaze a pan or boost a quick sauce.
 Save to Pinterest
 Good broth is really just patience and water and a few humble ingredients given enough time to become something extraordinary. Once you make it yourself, you will never look at a store bought carton the same way again.
Your Questions Answered
- → How long should bones simmer?
-
Simmer on low for at least 12 hours; 18–24 hours pulls more collagen and minerals for a richer, more gelatinous result. Top up water as needed and keep a gentle simmer.
- → Is roasting the bones necessary?
-
Roasting for ~30 minutes at 400°F (200°C) deepens color and develops savory notes, but you can skip it for a lighter, cleaner-tasting liquid.
- → What does the apple cider vinegar do?
-
A small splash helps break down connective tissue and draw minerals from the bones. Use 1–2 tablespoons in cold water before heating; it won’t make the liquid noticeably vinegary.
- → How should I store and reheat it?
-
Cool and refrigerate up to 5 days or freeze portions up to 3 months. Reheat gently over low heat; skim hardened fat from the surface after chilling if you prefer a leaner liquid.
- → How can I improve clarity and texture?
-
Skim foam during the first hour, strain through a fine-mesh sieve or cheesecloth, and use joints and marrow bones for greater gelatin; long, low simmering improves body without clouding flavor.
- → What are common ways to use the broth?
-
Enjoy warm on its own as a nourishing drink or use it as the foundation for soups, stews, risottos, sauces and braises; reduce to concentrate flavor for sauces.