Save to Pinterest
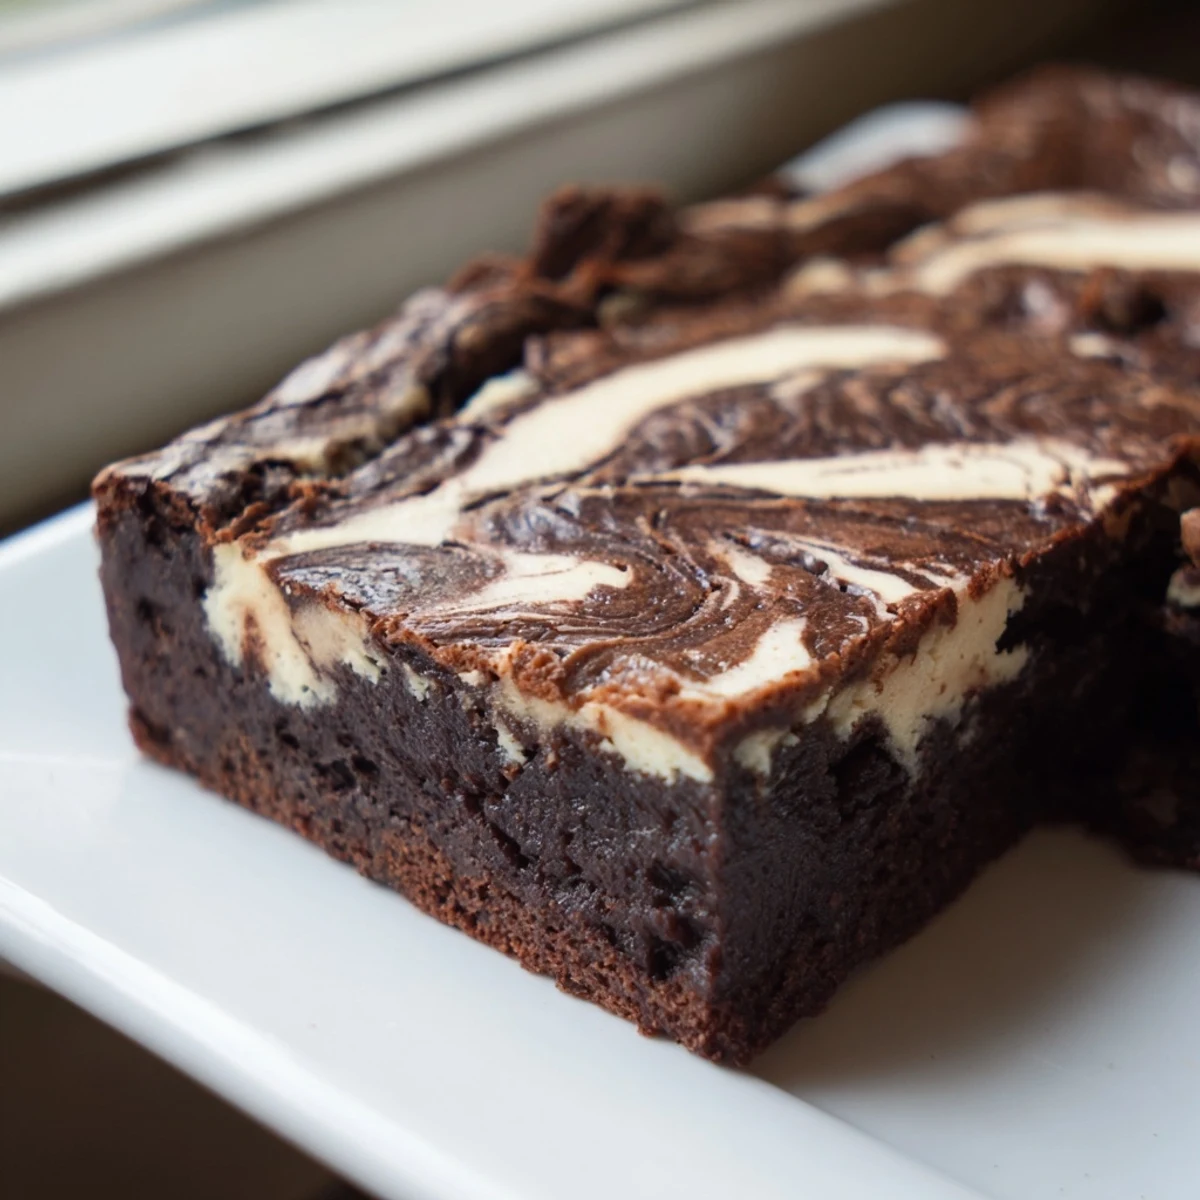
 These indulgent bars combine the best of both worlds: fudgy, rich brownie base infused with tangy sourdough starter, topped with a velvety cheesecake layer. The sourdough discard adds subtle complexity and moisture, while the marbled swirl creates stunning visual appeal. Perfect for gatherings or weekend baking.
My sourdough starter had been sitting in the fridge for two weeks, neglected and hungry, when I decided its discard deserved better than the compost bin. That hazy Tuesday evening I melted chocolate into butter, stirred in the funky discard, and layered it with cream cheese on a whim. The bars that came out of the oven were absurdly good, fudgy and tangy in a way that made me question every plain brownie I had ever baked. Now I keep my starter fed partly out of guilt, mostly because these bars demand it.
I brought a pan of these to a neighborhood potluck last spring and watched a woman named Dee eat three bars while standing over the tray, barely pausing between bites. She cornered me by the punch bowl and demanded the recipe, which remains the most aggressive compliment I have ever received.
Ingredients
- Unsalted butter (115 g): Use good butter here because its flavor runs through every layer of these bars.
- Dark chocolate, chopped (120 g): Chop it yourself from a bar rather than using chips, which contain stabilizers that fight against a fudgy texture.
- Granulated sugar (150 g for brownies, 50 g for cheesecake): Two separate doses, one for each layer, so measure them into different bowls before you start.
- Large eggs (3 total): Room temperature eggs blend more smoothly into both batters, so pull them out of the fridge first thing.
- Vanilla extract (2 tsp total): Split between the brownie base and the cheesecake layer to round out the flavors in both.
- Sourdough starter, discard or fed (90 g): This is the secret weapon, and honest to goodness, discard works beautifully here so do not stress about it being active.
- All purpose flour (65 g): Just enough to give the brownies structure without turning them cakey.
- Salt (1/4 tsp): A small amount that does heavy lifting against all that sugar and chocolate.
- Cream cheese, softened (225 g): Leave it on the counter for at least an hour because cold cream cheese will leave you with lumps no amount of beating can fix.
Instructions
- Prep the pan and oven:
- Heat your oven to 175C (350F) and line a 20x20 cm pan with parchment, letting the paper hang over the edges like handles. These handles will save you later when you need to lift the whole slab out cleanly.
- Melt chocolate and butter:
- Set a saucepan over low heat and melt the butter with the chopped chocolate, stirring gently until the mixture turns into a glossy dark pool. Take it off the heat the moment everything is smooth, then stir in the sugar until it dissolves into the warmth.
- Build the brownie batter:
- Let the chocolate mixture cool for a few minutes so it does not scramble your eggs, then whisk in the eggs one at a time until each disappears completely. Stir in the vanilla and sourdough starter, then fold in the flour and salt with a spatula just until you stop seeing dry streaks.
- Spread and reserve:
- Pour roughly three quarters of the brownie batter into your lined pan and spread it to the corners. Scoop the remaining quarter cup into a small bowl and set it aside, because this is what you will use for swirling later.
- Make the cheesecake layer:
- Beat the softened cream cheese with the sugar until it turns completely smooth and creamy, scraping down the bowl once or twice. Add the egg and vanilla and beat again just until everything is silky, then gently spread this mixture over the brownie base in an even layer.
- Swirl and bake:
- Drop small spoonfuls of the reserved brownie batter over the cheesecake, then drag a skewer or knife through the dollops in figure eight motions to create marble swirls. Bake for 30 to 35 minutes until the center is just barely set and a toothpick comes out with a few moist crumbs clinging to it.
- Cool and chill:
- Let the pan cool completely at room temperature, then refrigerate for at least one hour before slicing. Patience here is the difference between neat bars and a gooey mess on your cutting board.
 Save to Pinterest
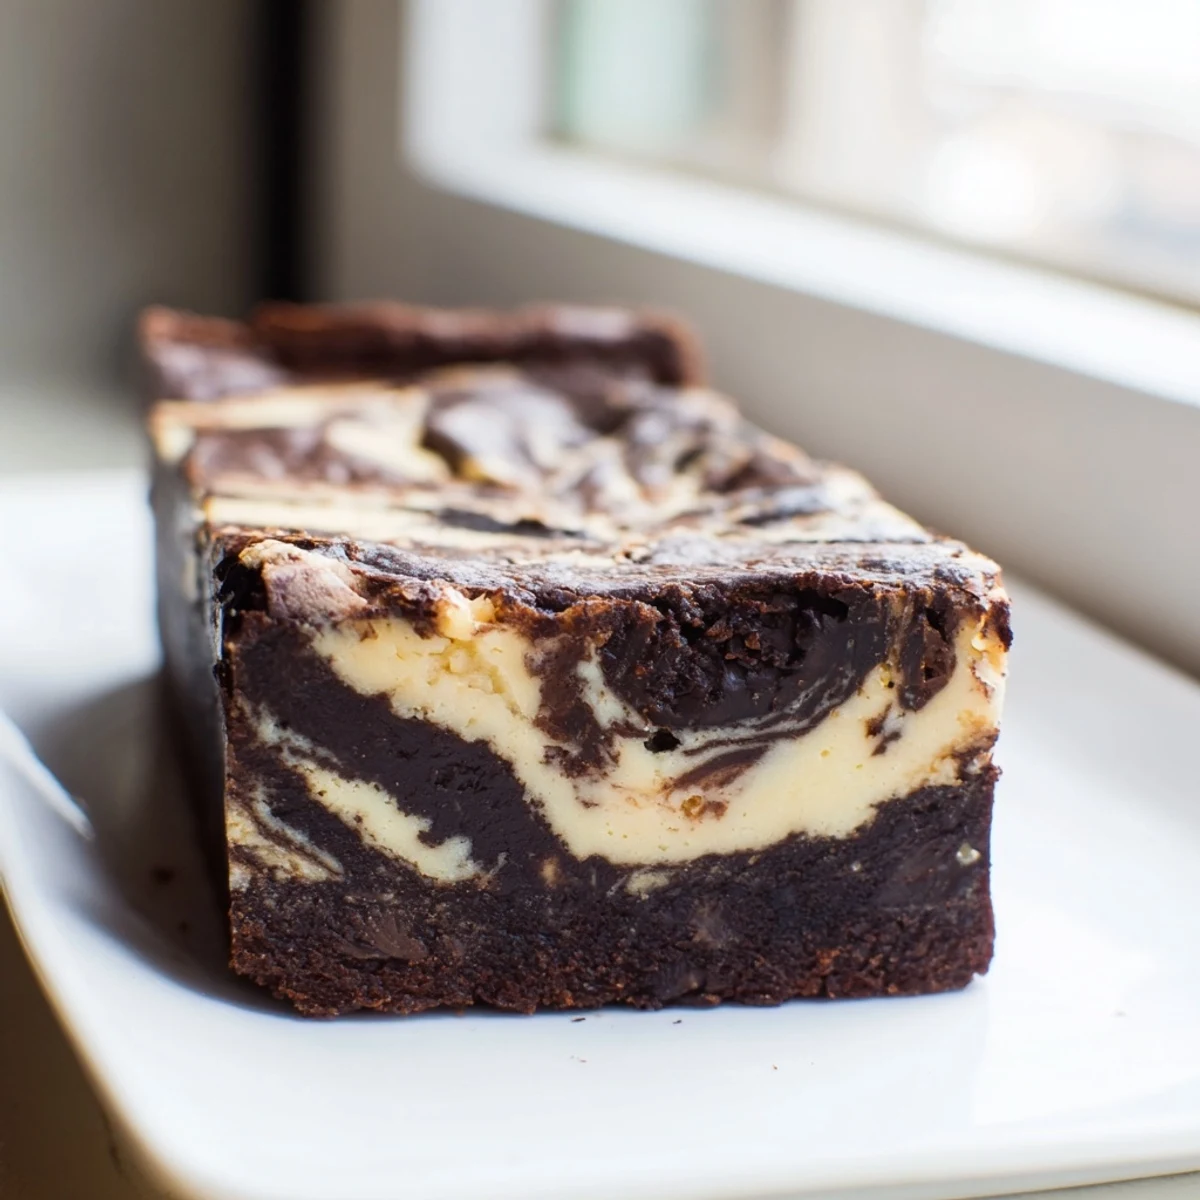
 The real magic happened the morning after my first batch, when I pulled a cold bar from the fridge with my coffee and discovered the texture had transformed into something denser and almost truffle like.
Getting That Swirl Right
The swirl is pure theater but it matters, not just visually but because it distributes pockets of concentrated brownie flavor throughout the creamy layer. Move your skewer slowly and deliberately, and resist the urge to overmix or you will muddy the whole thing into a muddy brown homogenous mass.
Sourdough Discard Versus Fed Starter
I have made these with both peak fed starter and week old discard, and the bars taste nearly identical either way because the leavening power is irrelevant here. What you want is that fermented tang, and discard actually delivers it more intensely, which makes this recipe the perfect excuse to skip feeding day.
Storing and Serving
These bars keep beautifully in the refrigerator for up to five days, and I actually prefer them cold because the cheesecake firms up and the brownie becomes wonderfully dense. Let them sit at room temperature for about ten minutes if you want a slightly softer bite.
- Wrap individual bars in parchment paper if you are packing them for lunches or picnics.
- Freeze well wrapped bars for up to three months and thaw them overnight in the fridge.
- Always use a sharp knife wiped clean between cuts for the neatest slices.
 Save to Pinterest
 Every time I scrape the excess batter from the saucepan with my finger, I remember why I started baking in the first place. These bars are worth every dirty dish.
Your Questions Answered
- → Can I use active starter or discard?
-
Either works perfectly in these bars. Active starter will provide a slightly more pronounced tang, while discard still adds wonderful moisture and subtle complexity to the chocolate base.
- → How do I know when they're done baking?
-
The center should be just set with a slight wobble, similar to traditional cheesecake. A toothpick inserted should come out with moist crumbs rather than wet batter. They'll continue setting as they cool.
- → Why chill before cutting?
-
Chilling for at least one hour helps both layers set completely, making it easier to achieve clean, neat slices. The bars also develop better flavor after cooling and chilling.
- → Can I add mix-ins?
-
Absolutely! Chocolate chips, chopped nuts, or espresso powder folded into the brownie base add delicious variation. Just avoid overloading the batter to maintain proper texture.
- → How long do these keep?
-
Store in the refrigerator for up to 5 days in an airtight container. The bars actually improve after a day as flavors meld. They can also be frozen for up to 3 months.