 Save to Pinterest
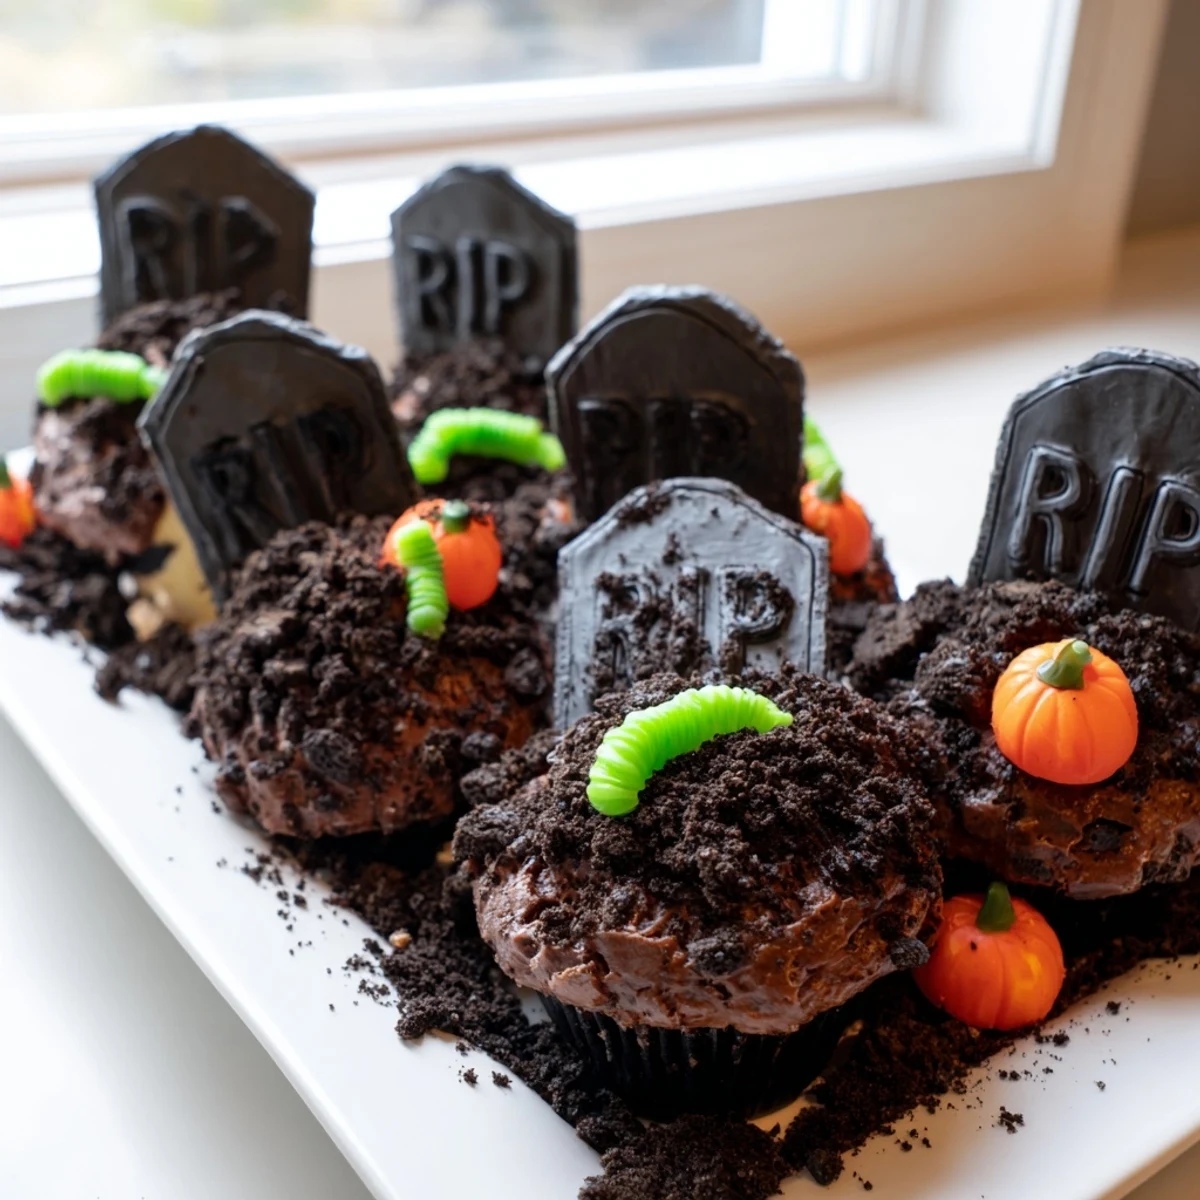
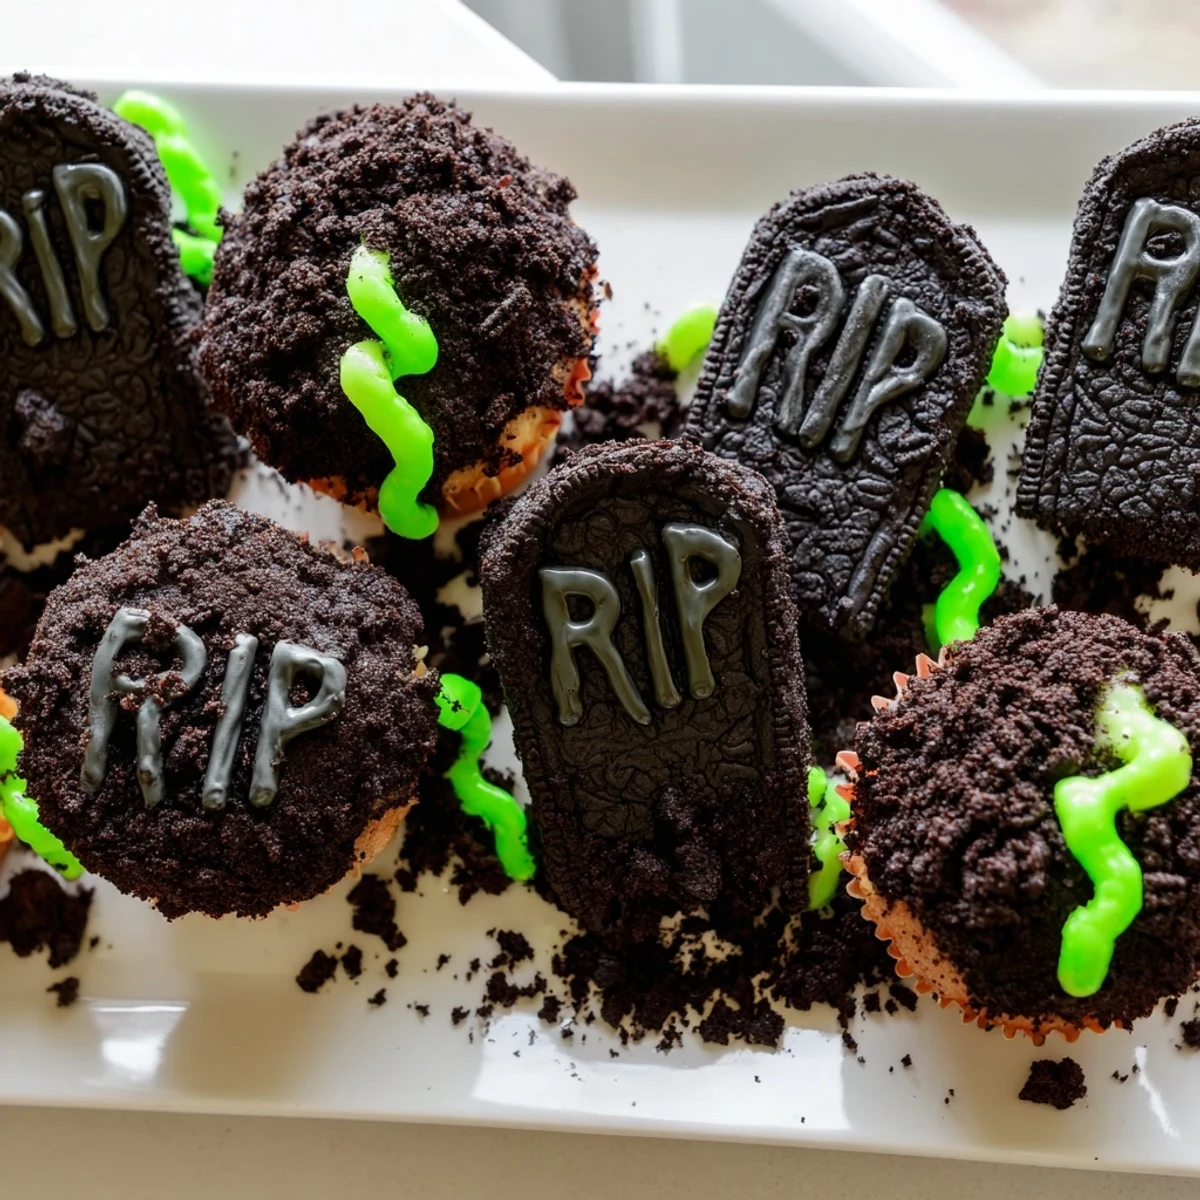
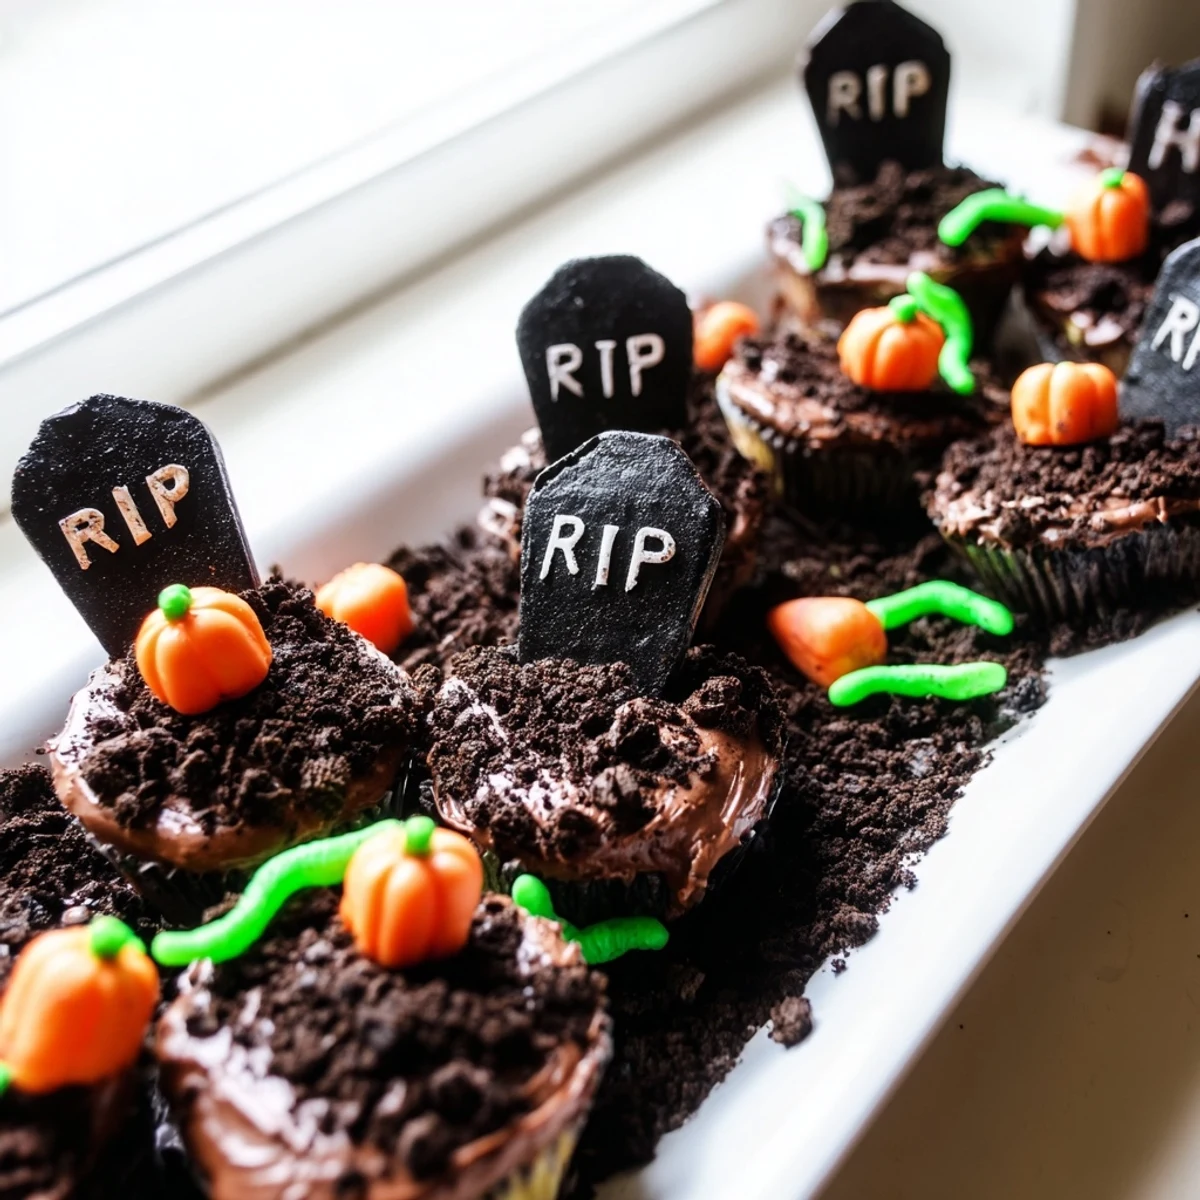
 Create a spooky Halloween dessert with these chocolate cupcakes topped with creamy chocolate frosting, crushed cookie "dirt," and edible tombstone decorations. Perfect for parties and gatherings, these pull-apart treats combine rich chocolate flavor with festive graveyard theming. The assembly is fun for all ages, making it an ideal family activity during the Halloween season.
The year my daughter turned eight, she announced she wanted a graveyard party instead of the usual princess theme. I stood in my kitchen wondering how this would actually work, but seeing her eyes light up at the idea of edible tombstones made me dive right in. Those cupcakes disappeared faster than any ghost story I have ever told, and now they have become our October tradition that the kids actually start asking for in September.
Last Halloween, my kitchen looked like a chocolate explosion with cookie crumbs everywhere and three small children seriously focused on writing RIP on vanilla wafers. One of them accidentally wrote RIP MOM which sent everyone into fits of laughter including myself. That is the moment I realized these cupcakes are not just dessert they are memory makers.
Ingredients
- All purpose flour: The backbone of tender cupcakes that hold up under all that heavy frosting
- Unsalted butter: Room temperature butter creates the perfect fluffy texture for both cake and frosting
- Granulated sugar: Sweetens and tenderizes creating a fine crumb structure
- Whole milk: Adds moisture and richness keeping cupcakes from drying out
- Large eggs: Provide structure and lift making sure your cupcakes rise properly
- Baking powder: The leavening agent that gives your cupcakes their airy rise
- Vanilla extract: Pure vanilla makes everything taste homemade and comforting
- Powdered sugar: Creates that silky smooth frosting texture without graininess
- Unsweetened cocoa powder: Deep chocolate flavor without making things too sweet
- Chocolate sandwich cookies: Crushed these create the most convincing edible dirt
- Rectangular cookies: Vanilla wafers or shortbread rectangles work perfectly as tombstones
- Gel icing pens: Essential for writing spooky messages and details
Instructions
- Preheat and prepare:
- Heat your oven to 350°F and line a 12 cup muffin tin with liners while you gather all your ingredients
- Mix the cupcake batter:
- Cream butter and sugar until fluffy then beat in eggs one at a time before adding vanilla
- Combine wet and dry:
- Whisk flour baking powder and salt separately then alternate adding dry ingredients and milk to the butter mixture
- Bake the cupcakes:
- Fill each liner two thirds full and bake for 18 to 20 minutes until a toothpick comes out clean
- Make the chocolate frosting:
- Beat butter until creamy then gradually add powdered sugar and cocoa powder followed by vanilla and milk
- Create the graveyard base:
- Arrange cooled cupcakes in a rectangle on your serving tray and frost them as one continuous surface
- Add the creepy details:
- Sprinkle crushed cookies over the frosting for dirt then press in decorated tombstone cookies and any spooky candies
 Save to Pinterest
 My neighbor asked me to make these for her sons school party and I will never forget the text message photo showing a dozen first graders gathered around the platter pointing at different tombstones they had created. Sometimes the best parties are the ones where dessert becomes the main activity.
Making It Your Own
Try chocolate cupcakes instead of vanilla for an even darker graveyard effect. The chocolate on chocolate creates such a rich dramatic look that feels especially fancy for a Halloween party.
Getting Ahead
Bake and cool cupcakes up to two days in advance storing them in an airtight container. The frosting can also be made ahead and kept refrigerated then brought to room temperature before spreading.
Party Planning Tips
Set up a decorating station with different candies and let guests create their own tombstone designs. This keeps everyone entertained and makes each cupcake unique.
- Keep extra crushed cookies on hand for touching up the dirt during the party
- Have wet wipes nearby for sticky fingers after all the decorating fun
- Photograph the final graveyard before serving because it disappears quickly
 Save to Pinterest
 There is something magical about watching adults and kids alike get equally excited about writing silly messages on cookie tombstones. Happy haunting and happy baking.
Your Questions Answered
- → How far ahead can I make these cupcakes?
-
Bake cupcakes up to 2 days in advance and store in an airtight container. Frost and assemble the graveyard decorations within 4-6 hours of serving for best results. The cookie dirt may soften if assembled too early.
- → Can I use store-bought cupcakes to save time?
-
Absolutely! Use your favorite store-bought chocolate cupcakes or a cake mix. Focus your efforts on the creative decorating process with frosting, cookie dirt, and tombstone embellishments.
- → What cookies work best for tombstones?
-
Rectangular biscuits, vanilla wafers, or even graham crackers cut into tombstone shapes work well. Make sure they're sturdy enough to stand up when pressed into the frosting.
- → How do I transport these without damaging decorations?
-
Assemble on a sturdy, portable serving tray with sides. Cover loosely with plastic wrap or a large cake dome. Avoid stacking or tilting during transport to keep tombstones upright.
- → Can I make these gluten-free?
-
Yes! Substitute gluten-free flour blend in the cupcakes and use certified gluten-free cookies for both the dirt and tombstones. Many gluten-free chocolate sandwich cookies are available at grocery stores.