 Save to Pinterest
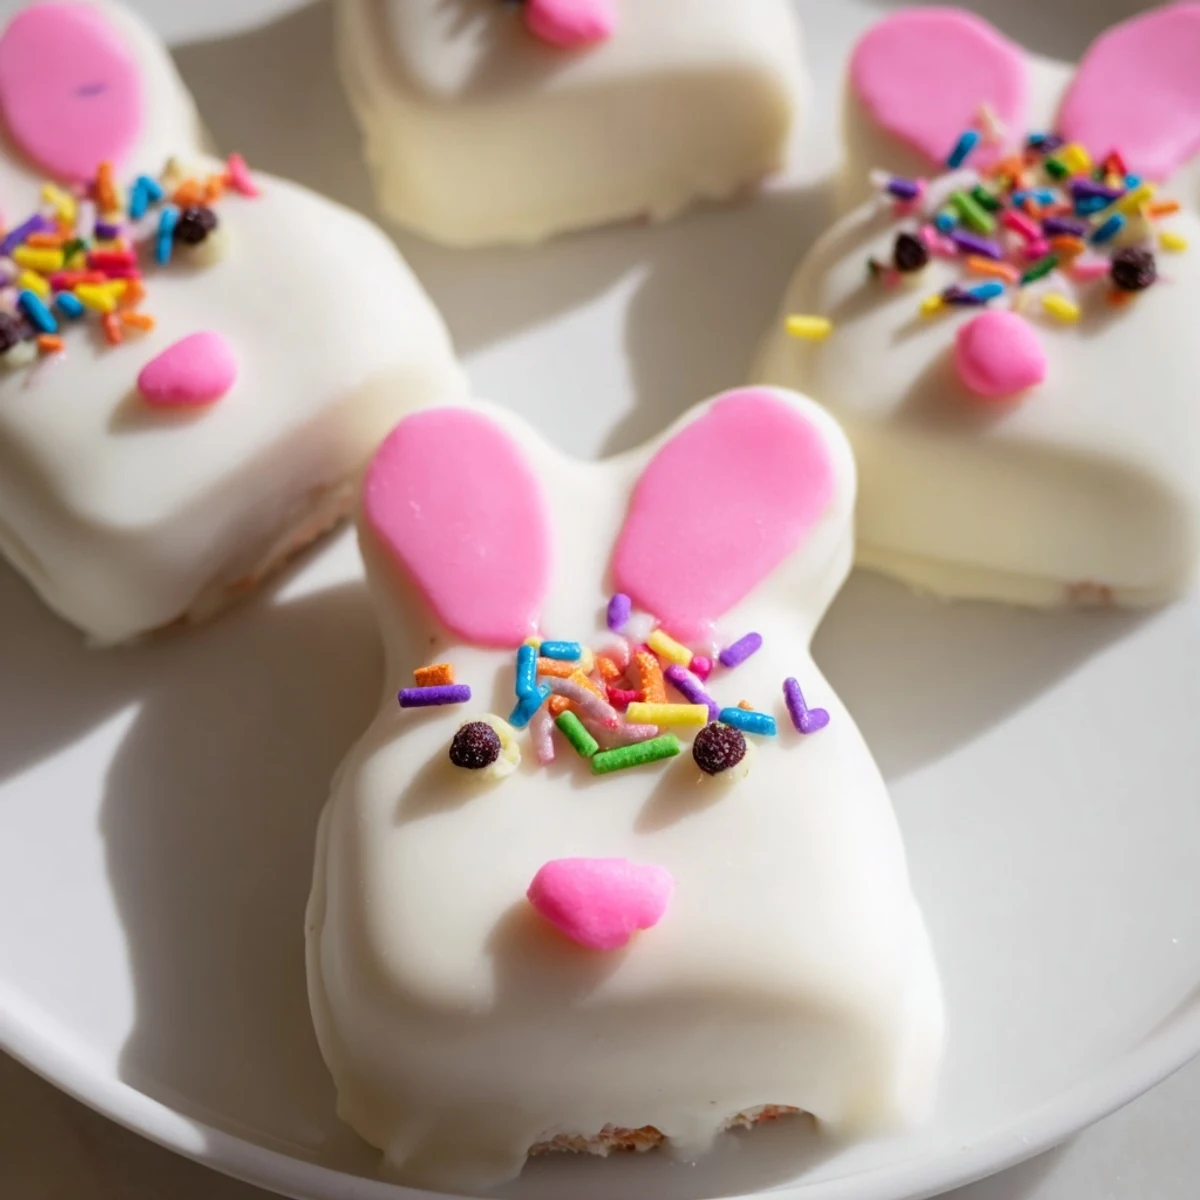
 These delightful bunny-shaped treats combine moist vanilla cake with a rich white chocolate coating, creating the perfect festive addition to any Easter celebration. The cake mixture starts with vanilla crumbs blended with cream cheese, butter, and vanilla for a dough that holds its shape beautifully when formed into adorable bunny faces.
After shaping and chilling, each cake pop gets dipped in melted white chocolate for that signature smooth finish. The real fun begins with decorating—add candy eyes, pink noses, floppy fondant ears, or colorful sprinkles to bring your bunnies to life. These treats come together in just one hour and yield eight festive cakesicles.
The preparation is incredibly straightforward, making it an excellent activity for families to enjoy together during holiday preparations. You can easily customize the interior with different cake flavors like chocolate or lemon, while the white chocolate exterior offers endless decoration possibilities from simple sprinkles to intricate fondant details.
The kitchen counter was already covered in pastel sprinkles when my youngest announced we needed something more impressive than regular cake pops for the class Easter party. That afternoon became a glorious experiment in bunny-shaped confections that had us all eating way too much white chocolate and laughing at our lopsided ear attempts.
Last year my neighbor's daughter saw me making these through the window and knocked on the door within minutes. Now it is become our annual Easter tradition to make a whole batch together while listening to her favorite spring playlist.
Ingredients
- 1 cup vanilla cake crumbs: The foundation of everything, I have learned that slightly stale cake actually works better than fresh
- 2 tbsp cream cheese: This binds everything together with just the right amount of tang
- 1 tbsp unsalted butter: Room temperature is non-negotiable here for smooth mixing
- 2 tbsp powdered sugar: Just enough sweetness without turning the filling into frosting
- 1/2 tsp vanilla extract: Pure vanilla makes all the difference in the final flavor
- 10 oz white chocolate: Get the good stuff, it accounts for most of the flavor
- Edible gel food coloring: Pink and yellow are perfect for those bunny features
- 8 cakesicle sticks: Make sure they are food-safe and sturdy enough to hold the weight
- Sprinkles and candy eyes: The personality makers, go wild with these
Instructions
- Mix the cake base:
- Combine cake crumbs, cream cheese, butter, powdered sugar, and vanilla in a medium bowl until the mixture holds together like soft dough when squeezed.
- Shape the bunnies:
- Divide into 8 portions and gently flatten each into an oval shape, pressing the cakesicle stick about halfway through each one.
- Chill until firm:
- Refrigerate the shaped cakesicles for at least 20 minutes until they are firm to the touch.
- Melt the coating:
- Heat white chocolate in 30-second intervals, stirring between each, until completely smooth and fluid.
- Dip and decorate:
- Submerge each cakesicle in the melted chocolate, tap off excess, then immediately add candy eyes and decorations before the coating sets.
 Save to Pinterest
 My sister accidentally dropped her first attempt on the floor and we all watched in slow motion horror. We salvaged it, redecorated it with extra sprinkles, and that bunny became the most talked-about treat at the party.
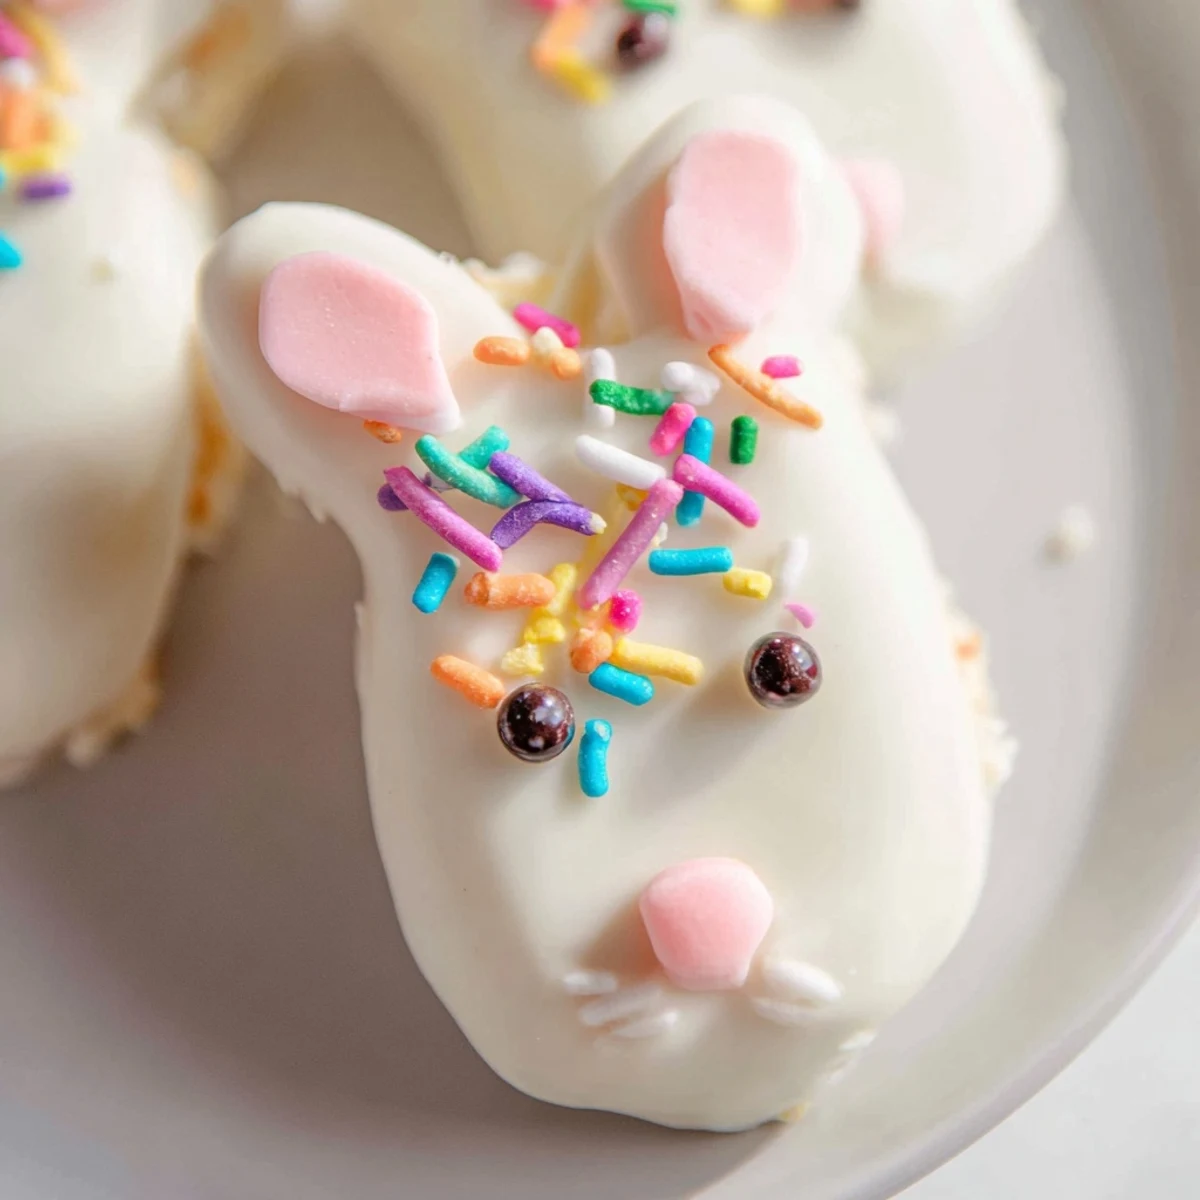
Making Perfect Bunny Ears
Fondant works beautifully for ears if you roll it thin and let it firm up slightly before attaching. I have also used pretzel sticks dipped in pink chocolate for a playful crunchy twist that kids absolutely love.
Storage Secrets
These keep surprisingly well in the refrigerator for up to three days, though they rarely last that long in my house. Let them come to room temperature for about ten minutes before serving for the best texture and flavor experience.
Flavor Variations
Chocolate cake crumbs transform these into something completely different and equally delicious. Lemon cake with white chocolate feels like pure spring in every single bite.
- Try swirling pink food coloring into the white chocolate for a marbled effect
- Add a tiny pinch of sea salt on top before the chocolate sets
- Crush some freeze-dried strawberries into the coating for natural color and flavor
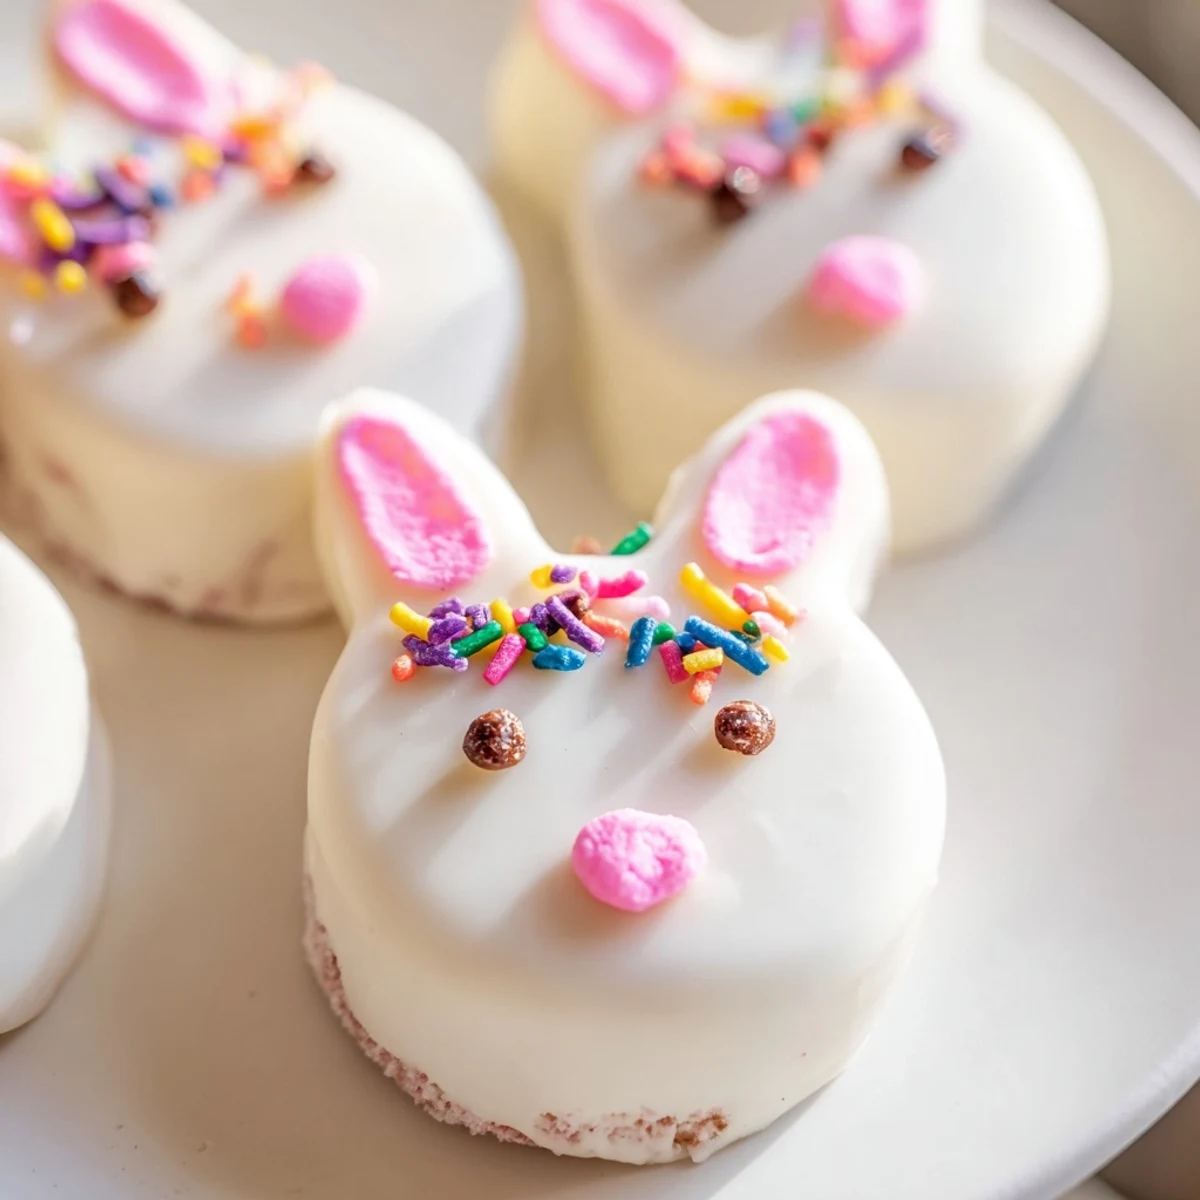 Save to Pinterest
 There is something about seeing these little bunny faces lined up on a platter that makes everyone smile, no matter their age. Happy Easter and may your sprinkles be plentiful.
Your Questions Answered
- → How far in advance can I make these bunny cakesicles?
-
These treats can be prepared up to 3 days in advance when stored properly in an airtight container in the refrigerator. The coating maintains its smooth texture, and the cake stays moist. For best results, add delicate decorations like candy eyes or fondant details closer to serving time to prevent any moisture from affecting their appearance.
- → Can I freeze these Easter treats for later?
-
Yes, these freeze beautifully for up to one month! Wrap each cakesicle individually in plastic wrap, then place them in a freezer-safe container. Thaw overnight in the refrigerator before serving. The white chocolate coating may develop slight condensation during thawing, but this typically disappears at room temperature without affecting the appearance or taste.
- → What other cake flavors work well for these bunny-shaped treats?
-
While vanilla provides a classic canvas that pairs perfectly with white chocolate, you can experiment with chocolate cake crumbs for a rich contrast, lemon for bright spring notes, or even red velvet for a colorful interior surprise. The key is ensuring the cake is finely crumbled and mixed thoroughly with the binding ingredients to maintain the proper shape during dipping and decorating.
- → Do I need a special mold to create the bunny shape?
-
No special mold is required! The instructions guide you through hand-shaping the cake mixture into flattened ovals or bunny face forms, which actually gives each treat a charming, artisanal quality. Simply divide the mixture evenly, press gently with your hands to form the shape, insert the stick, and chill until firm before coating with chocolate.
- → What's the best way to melt the white chocolate for coating?
-
Melting in short 30-second bursts in the microwave is the easiest method—stir thoroughly between each interval to prevent scorching. White chocolate can seize if overheated, so patience is key. If the coating seems too thick for even dipping, add a teaspoon of coconut oil or vegetable shortening to achieve that perfectly smooth, dippable consistency that coats evenly without dripping off.
- → How can I make these treats more festive for Easter?
-
Beyond the classic bunny decoration, try swirling pastel food coloring into the white chocolate before dipping for a marbled effect, use edible glitter for sparkling ears, or create different expressions with various candy arrangements. Pastel sprinkles, edible pearls, and even tiny edible flowers can transform these into stunning centerpieces for your holiday dessert table.